Apparel and merchandise personalization
Print designer for T-shirts, hoodies and merchandise
The customer sees the design on a photo of your product, inside the print area you mark in the template. Only the print goes to production, at the size of the area, as a 300 DPI PNG with transparency or as a PDF. The designer was built by a company that prints apparel itself.
- Preview
- Mockup on a product photo, print area in mm
- Print positions
- Front, back, sleeve, each with its own area
- Product options
- Colour or type (T-shirt, polo) changes the photo
- File
- 300 DPI PNG with transparency (Premium) or PDF
Preparing a mockup
- In a mockup template, upload a product photo.
- Mark the print area: drag a rectangle and resize it with the corner handle.
- Enter the print width in millimetres. The height follows from the shape of the area.
A product can have several sides, such as front, back and sleeve. Each side has its own photo and area, so the sleeve can be smaller than the front. Sides can be optional. You get one PDF with all sides or a ZIP with a PNG per side.
T-shirt colour from the product option
Turn on a different photo per option, read the options from the product (IdoSell, WooCommerce, PrestaShop, Shoper) and upload a photo for each. When the customer chooses a black T-shirt in the shop, the designer shows a black one. A polo can have a different print area than a T-shirt. Sizes S–XL do not change the photo.
The chosen variant is added to the order comment, so the print room knows which colour to use.
Tools for the customer
- One-click background removal, an eraser and a magic eraser for removing objects. The AI models run on our own server.
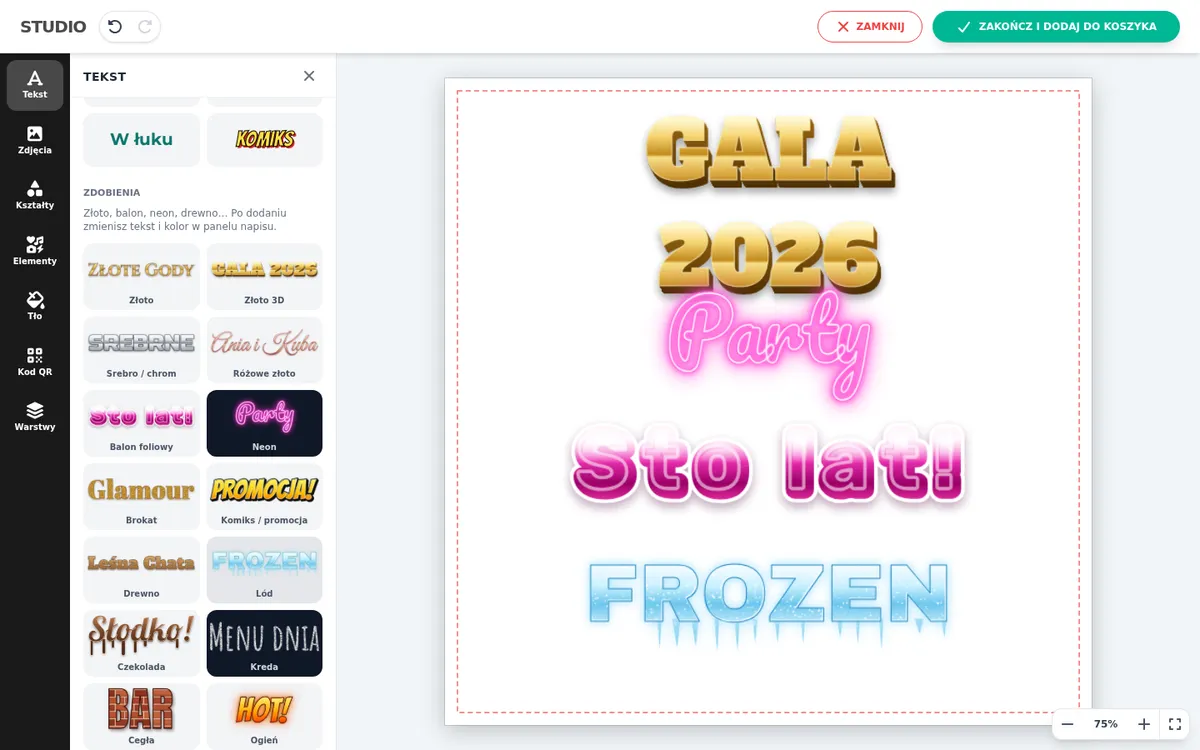
- 38 fonts, text on an arc, outlines, 3D and 18 lettering styles, including gold, chrome, neon and glitter.
- Over 5,000 elements and icons, QR codes, your shop’s graphics and ready-made design templates.
- An image generator from a text description (OpenAI or Google Gemini). The shop decides whether to enable it and how many generations a day to allow.
A T-shirt with a name, without designing from scratch
Not every customer wants to design. In the simple designer they pick an occasion and a category on the left, e.g. Birthday › For kids, and instantly see a ready design on the photo of the T-shirt or mug on the right. They only change the fields you mark in the design, such as a name and age, with a character limit.
- Up to 4 choice steps. Options of the next step can be attached to options of the previous one.
- The designer opens full screen or in a window over the product page (small, medium or large). On phones it always takes the full screen, with the preview above the options.
- The “Upload your own design” and “Generate with AI” buttons lead to the full designer, if you keep them.
The print file matches the preview exactly, so you don't have to fix the design before production.
Orders from Allegro and Amazon
Printed T-shirts are often sold on marketplaces, where there is no product page with a designer. There the customer gets a designer link after purchase, via Base, Apilo or SellAsist. More on the marketplace personalization page.
Frequently asked questions
In what format do I get the print?
Just the print at the size of the area, as a 300 DPI PNG with transparency (Premium plan) or as a PDF. The T-shirt photo is not included in the file.
Can the customer design the front and the back?
Yes. A multi-side product has separate sides such as front, back and sleeve. The customer switches between them in the designer.
Can I add ready-made print designs?
Yes. You prepare a design with replaceable text and a logo spot in the panel. Shoppers pick it from the templates tab in the designer.
See also
Try the designer on your own products
30 days free, no card and no automatic payments. Standard costs 249 PLN net per month, Premium 349 PLN. One shop and one order system are included.